Third panel complete
I finished up the third panel for the tunnel tonight. All three panels are fit and drilled. There is a little trimming to do here and there and a few holes left to debur. The next step will be to install the nut plates on the flanges. After that I can do the finish pass on the flanges with a coat of micro and a little sanding. That will smooth out the flange walls and build up the edges so they are flush with the sheet metal. The last step will be to make a final stainless steel cover with the wrap around.
The exhaust tunnel epic is nearing the end.

Slow and Steady
I cut, fit and mostly drilled the right side tunnel panel tonight. I took my time getting the fit around the wing attach and flying wire brackets. They came out well and look nice. The rear edge and flange still need to be trimmed. I'll do that after both sides are done to make sure it all comes out straight.
I also used a piece of scrap stainless to make the cover for the old bungee cutout that will wrap around to the front of the tunnel. I roughed it out pretty quick, so it doesn't fit as well as the final part should. It will be tricky getting the radius bent correctly for the bend on the bottom, but should be controllable if I build a form to get the shape right. This picture shows the new side panel and the stainless. It starting to look how I had it pictured in my head.
I don't have a shear for cutting the long straight lines, so I've been using an old method I heard about recently. A straight-edge is used to score a line with a utility knife. The aluminum is scored 5-10 times depending on the condition of the blade and then the excess sheet is snapped off. I've been struggling to cut nice straight lines with tin snips, but this method is much easier and the results are ten times better. A quick pass with a mill file deburs the edge nicely and the part stays flat and straight. Now I save the snips for cuts that can't be done on a shear anyway.

Tunnel progress
Continued work on the exhaust tunnel. Tonight I got the center panel of aluminum cut and pilot drilled. A break was bent in the rear edge to match the flanges and rear former. A flange was bent on the front for stiffness. This is where the stainless will overlap after wrapping down from the firewall. The inside flanges on the fiberglass parts also got trimmed to size and cleaned up a bit. Got it all clecoed togther and took a couple pictures.
More here. Scroll to the bottom for the latest.

Tunnel flanges fit and new Catto prop
I didn't end up having much time to work today. I did run by the hangar and verify the fit of the tunnel flanges. They are spot on!. I need to figure out the screw layout and install the nut plates. The sheet metal should go quickly.
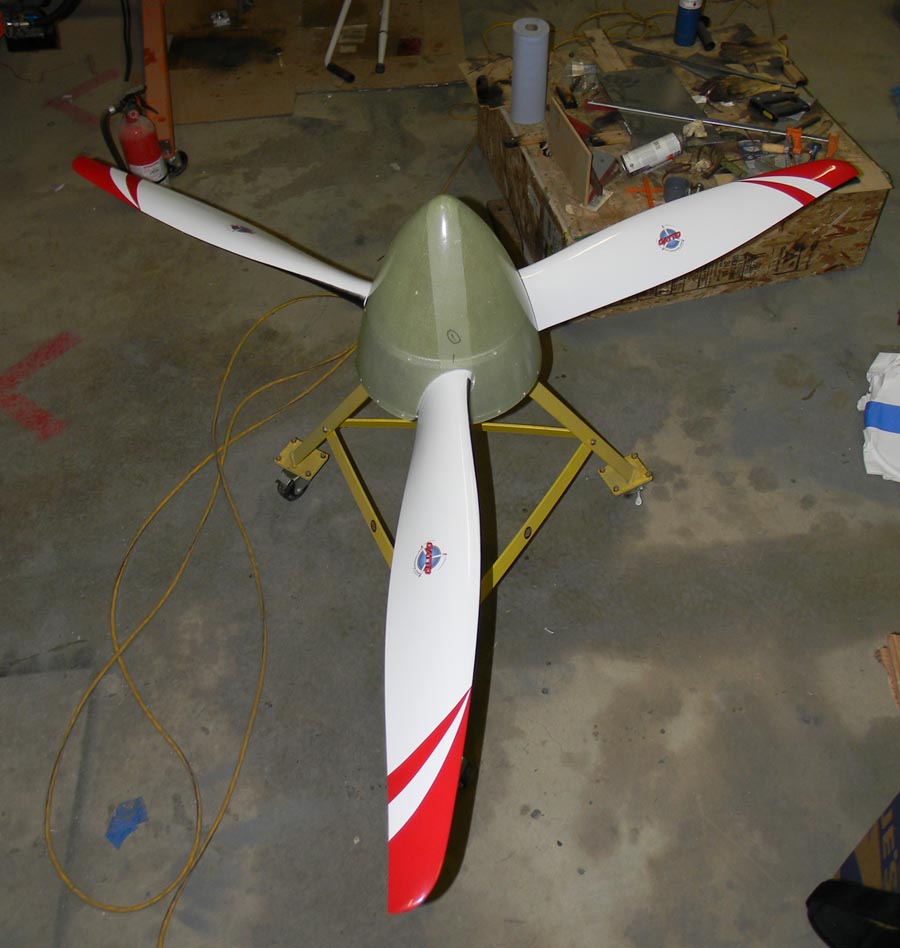
I also unpacked the new propellor from Craig Catto. It is gorgeous and I can't wait to see how it performs. Catto also cut and fit the spinner so a bunch of work was saved on my end. The diameter is 72 inches and the pitch is 58 inches. It weighs 17 lbs, which is half of the old metal Sensenich prop.
Here's the fit tunnel flanges and a shot of the prop sitting on an engine stand.

Tunnel flanges finished
I finished up some touch-up sanding on the new flanges tonight. They are finished and ready to be installed tomorrow.
In the picture they are roughly arranged as they will be installed on the Pitts. The square flanges on the front will butt up to the back of the firewall. They provide a nice way to seal up all the corners and angles. The three belly panels will still be aluminum. The center panel will end where the front curve begins. I have some stainless steel that I got to cover up the notch in the firewall for the old bungees. The stainless cover will wrap down around the curve and attach to the front edge of the aluminum center panel. It's more simple than it sounds.
The visible portions of the flange will need a little light filler and sanding when I'm ready to paint, but it will be minor. There are a couple more pictures on the Tunnel page.

Back to work
Now that the holidays are over, I've had a chance to get back to work on the Pitts. The fiberglass flanges for the exhaust tunnel are close to finished. I made some joggles for the seal with the firewall and have just a couple small details to finish up. Hopefully, I can cut the new sheet metal this weekend and wrap up the exhaust tunnel saga.
I removed one of the plywood skins from the new aileron a couple days ago. It was pretty easy with a sharp putty knife and some careful heating with a heat gun. The first formed plywood skin fits well and won't take much to clamp in place.
Some of the parts for the new Catto prop showed up last week. I got a box with the new spinner and the prop mounting parts from Saber. Nice stuff. The larger 13" spinner looks good with the stock Pitts cowl. The prop has been shipped and should arrive in the next day or two.
Except for a couple switches, I have everything I need to make the new panel. That will be on the short list of things to do pretty soon.
Fiberglass and plywood, continued...
The new fiberglass parts came out very well. I pulled them from the mold and they look great. The firewall joggles are next up. I also pulled the aileron leading edge ply out of the PVC pipe mold. It was in there for about two days. It held the curve well. It's a little more curve than needed, but not by much. This will make the installation much easier this time around. I still need to remove the old ply from the new aileron. It may get done in the next couple days.
Fiberglass and plywood
I've been busy with other stuff for the last week, but finally got out to the shop today. I made a form for the aileron leading edge plywood. It was made by splitting a piece of 4" PVC pipe. The plywood was soaked with water and clamped between the two halves of the pipe. I'll pull it out in a couple days to see how well the curve takes.
I also worked on the fiberglass flanges for the exhaust tunnel. I made a few adjustments to the plug to even out one of the fillets. Then it got re-taped and waxed. I laid up the parts using three layers of S-glass with thicker tapes added to the flanges for extra stiffness. The layup went well and I should be able to pop it off the plug tomorrow. When I get back out to the hangar, I'll make the new aluminum pieces. Later this week I'll make some joggles for the front to simplify the interface with the firewall.
Update on fiberglass tunnel flanges
Tonight I tried out the fit of the test parts on the fuselage. They came out right on the money! I guess it shouldn't be a surprise since the plug was built on the fuselage. Still, it's nice to see them actually fit.
I trimmed them up a bit and then chopped up the aluminum panels from the last attempt to piece it all together. I installed just enough screws to hold everything in place. The final installation will need to use a few more screws to keep things from flopping around. In the picture, the tunnel floor (center) is aluminum. The final part will be made out of stainless steel. I will make new side panels as well. These have a few extra holes and have been banged up a bit from messing with the last attempt.
There are more pictures here.

Fiberglass test parts
I tried laying up some test parts on the plug last night before bed. When I got home from work today, I was able to pop them off the plug and take a look. They came out really well! There are a couple flaws that will be easy to correct on the actual parts, but it worked better than I expected.
I covered the plug with mylar packing tape and then waxed with some mold release wax. I used some 4" fiberglass tape that I had around and put down two pieces on each side. The part release from the plug easily and didn't do any damage to the plug.
The areas with two layers of tape are stiff enough to work on the plane. When I make the actual parts, I'll use some S glass I have and probably do three layers to be safe. There were a couple voids where I laid a tape over the edge of the other tape. This will be easy to avoid on the next round. There were also a couple minor defects from the mylar tape not laying down (a bubble and a couple wrinkles).
I'm encouraged that it was this easy. I was intending to pull a mold off the plug, but after seeing the result, I'll just make the parts directly on the plug. I'll do a check for fit on the fuselage and then make the new parts.
It was hard to take a picture that really showed the result very well. Here is the best of the bunch. The actual parts will be trimmed down to about an inch for each flange.
